


Manage lessons
Create, edit, and delete a lesson
Manage the entire lifecycle of your tennis lessons
Creating, editing, and deleting lessons is a central task in managing your tennis club. Plugin.ch offers an intuitive interface to manage the entire lifecycle of your lessons: creation with rate configuration, editing of existing settings, and gradual or permanent deletion. Discover how to optimize the management of your teaching offerings.
Create a new lesson
Access lesson management
From the main menu, click LESSONS, then select MANAGE LESSONS. This gives you access to the centralized management interface for all your lessons.
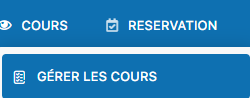
Menu for accessing lesson management
Start creating a new lesson
On the lesson management page, click the Add a lessonbutton. The creation form will appear, letting you configure all the settings for your new lesson.
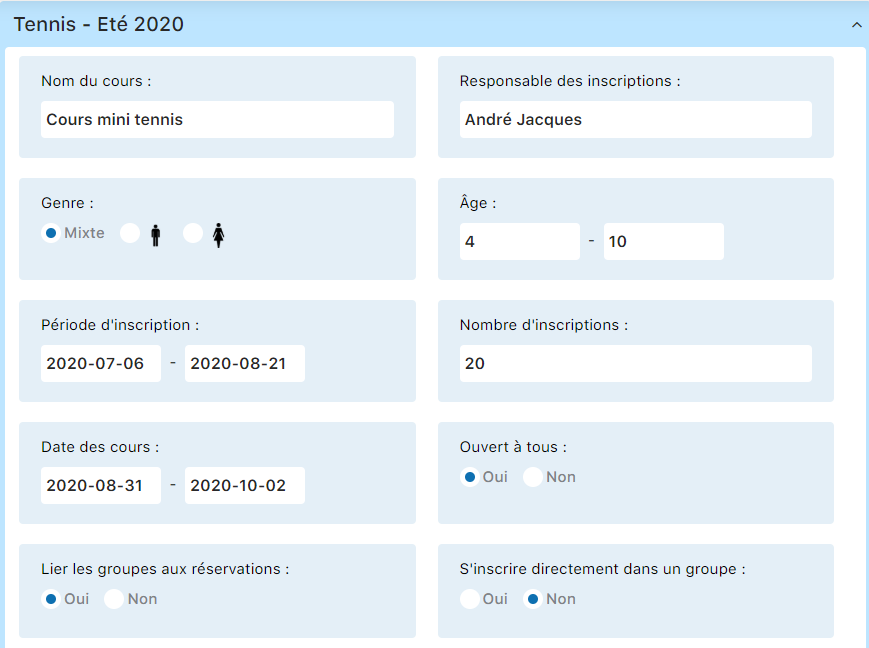
Management interface with the add lesson button
Fill in the essential information
The form offers several sections. Start with the basic information: lesson name, lesson type (mini-tennis, youth, adults, competition, etc.).
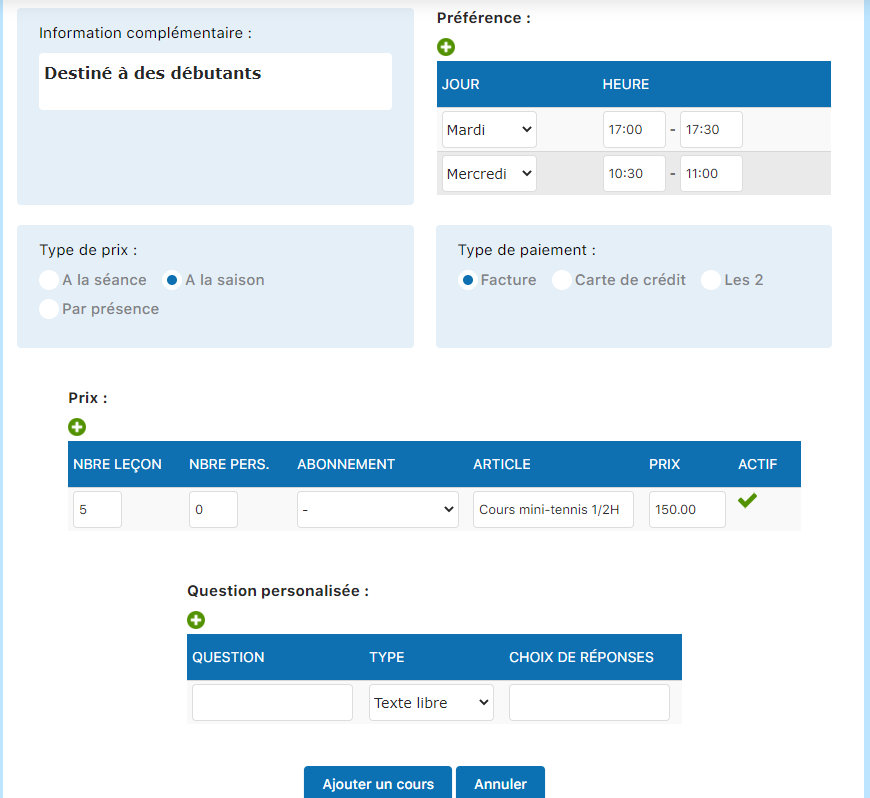
Main lesson creation form
Understand the key settings
Several settings play a crucial role in configuring your lesson. Here are the most important ones:
Link groups to bookings
If you select Yes, the lesson's dates and times will be directly integrated into the online booking system. This simplifies member registration. If No, you manage the dates manually.
Self-register directly in a group
If enabled, members can self-register for the lesson online without the instructor's involvement. It is generally recommended to disable this option and to form the groups yourself based on level and teaching needs.
Preferences (dates and times)
Define when and how your lesson takes place: days of the week, times, duration. This section structures your lesson's schedule.
Price type
Plugin.ch offers three pricing modes: per session (payment for each lesson), per season (full package), or per attendance (billing based on attendance).
Configure pricing
The pricing section is fundamental. The important fields are:
Number of lessons
For per sessionpricing, indicate the number of lessons per week. Example: 1 lesson per week = 1, 2 lessons per week = 2. For a per seasonpackage, set it to 1 and leave the number of people at 0.
Number of people
If the price changes depending on the group size, indicate the number of people. Set it to 0 if the price is the same regardless of the number of participants (fixed pricing).
Member vs non-member price
Plugin.ch lets you offer different rates depending on status (club member or visitor). Fill in both fields if applicable.
Select the billing item
Each lesson must be linked to a billing item created beforehand in your system. This item determines how the lesson will appear on invoices. Start typing the first 2 or 3 letters of the item's name to find it quickly in the list.
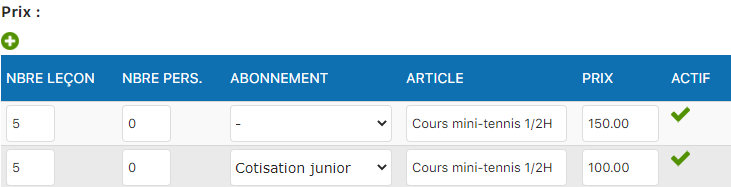
Item selection interface with autocomplete
Add custom questions (optional)
Plugin.ch lets you ask additional questions during online registration. For example: "Have you already played tennis?", "What is your estimated level?", or "Do you need a loaner racket?". These questions enrich your understanding of members. This section is entirely optional.
Click "Add a lesson"
Once all settings have been entered correctly, click the Add a lesson button at the bottom of the form. Your new lesson is now saved in the system.
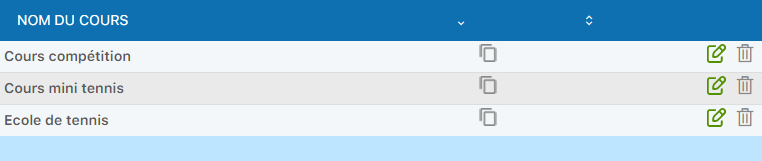
Your lessons now appear in the management list
Tip: Before creating your lessons, make sure all the necessary billing items have been created in your system. This saves you from going back and forth between the two sections and speeds up the process. Create the items first, then the lessons.
Edit an existing lesson
Locate the lesson to edit
In the lesson management list, find the lesson you want to edit. You will see several action icons next to each lesson: the pencil icon (to edit), the bookings icon, and the trash icon (to delete).
Each lesson offers several management options
Click the pencil icon
Click the pencil (edit) corresponding to the lesson you want to change. The edit form opens, showing all the lesson's current settings.
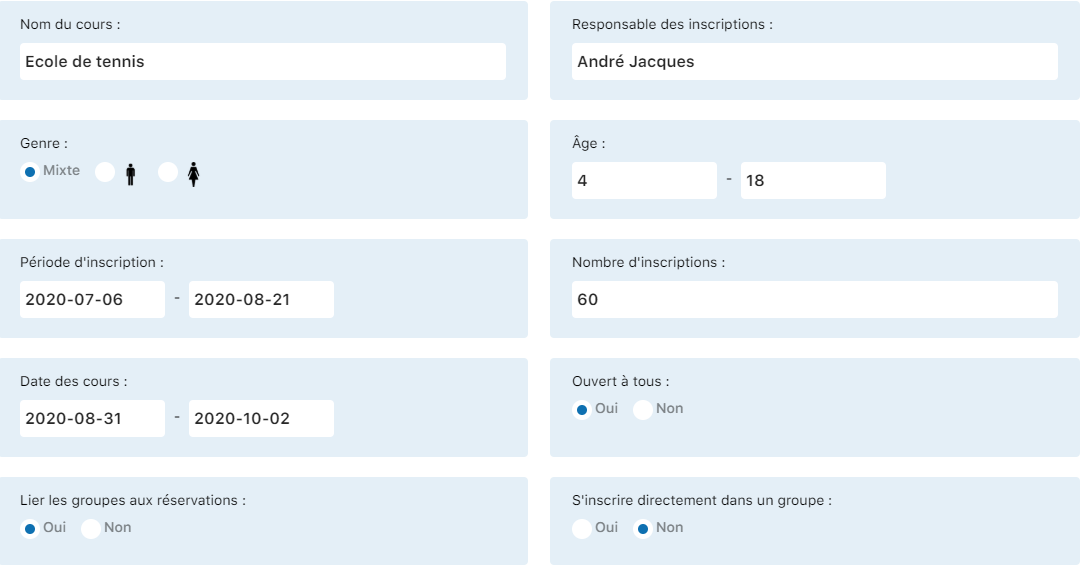
Click the pencil to access the edit form
Edit the desired settings
Change the elements you want to update: schedule, rates, number of lessons, billing item, or any other information. You can change almost all settings without limitation.
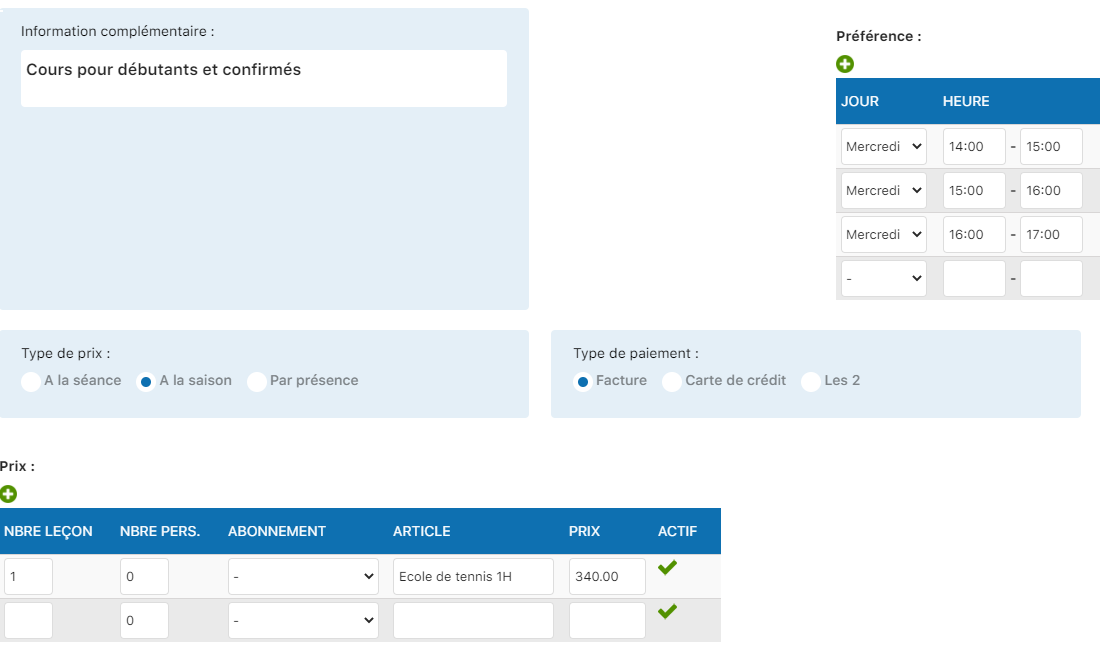
Edit form with all settings accessible
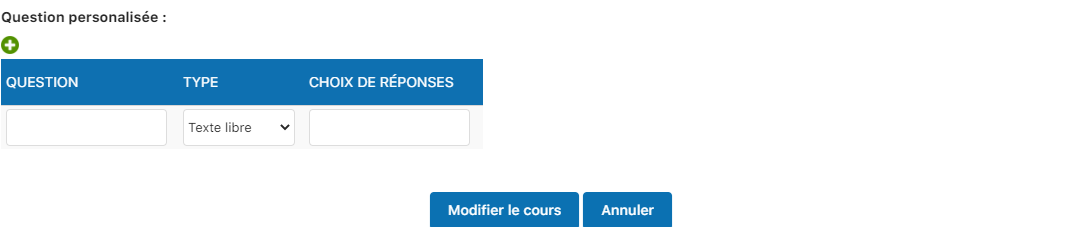
Continue editing the pricing and items sections
Save the changes
Once your changes are made, click the Edit lesson button at the bottom of the form. The changes are immediately applied and visible in your lesson list.
Disable or delete a lesson option
Open the lesson for editing
In your lesson list, click the lesson containing the options to disable or delete. Then click the pencil icon to open the edit form.
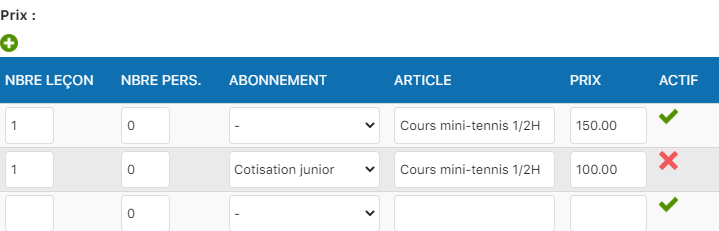
Click the lesson to access its settings
Disable an option
To disable an option without permanently deleting the lesson, click the checkmark symbol (✓) next to that option. The symbol becomes a cross (✕), indicating that the option is disabled. Then click Edit lesson to save.
Completely delete an option (advanced method)
To permanently delete an option (not just disable it), completely clear all its fields in the form. Make sure all details (schedule, price, etc.) are removed. Then click Edit lesson.
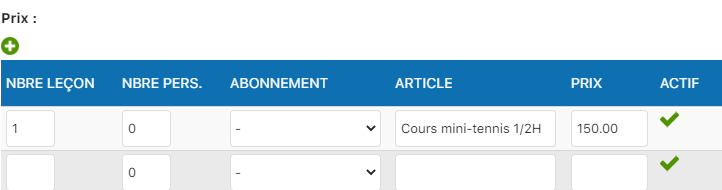
Clear the fields to completely delete an option
Warning: Completely deleting an option also deletes all associated bookings and data. Prefer disabling (✕ symbol) to archive an option without data loss. Use complete deletion only for corrections or errors.
Delete a lesson entirely
Locate the lesson to delete
In your lesson management list, identify the lesson you want to permanently delete. Find thetrash icon (🗑️) on the right of the lesson's row.
The trash icon allows permanent deletion
Click the trash icon
Click the lesson's trash icon. A confirmation message will appear asking if you are sure you want to delete this lesson.
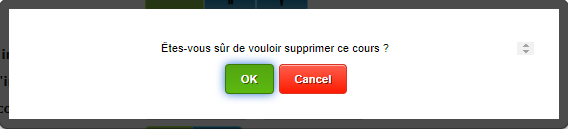
Click the trash icon to access deletion
Confirm the deletion
A confirmation message appears: "Are you sure you want to delete this lesson?". Click OK to confirm the permanent deletion. The lesson and all its data will be immediately deleted.
Warning: Deleting a lesson is irreversible. You will lose all associated data: bookings, registrations, pricing. Before deleting a lesson, make sure to back up any important information. Prefer disabling options if you want to keep a history.
Best practices for lesson management
- Test first : Create a test lesson before setting up your real lessons to familiarize yourself with the interface.
- Organize by category : Use clear, consistent names (e.g. "Mini-Tennis 2024", "Intermediate Adults Season 2024").
- Check the items : Make sure each lesson is linked to the correct billing item.
- Test the pricing : Check that price calculations are correct by creating a test lesson with different options.
- Document your settings : Keep a record of your configurations (number of lessons, rates) for year-to-year consistency.
- Back up before deleting : Export your lesson data before permanent deletion if you might need the history.
Plugin.ch tutorial — Manage lessons